Linux Accessibility Settings
To Open Accessibility Settings
Instructions below are for Ubuntu 21.10, but should work for most versions of Linux based on the gnome desktop.
- Open the Applications Menu: Click the Show Applications Button or press Windows + A (on most keyboards.)
- Click the Settings gear icon
- Click Accessibility
Pro-Tips:
- You can add an accessibility icon to the Ubuntu menu bar for easier access to accessibility features.
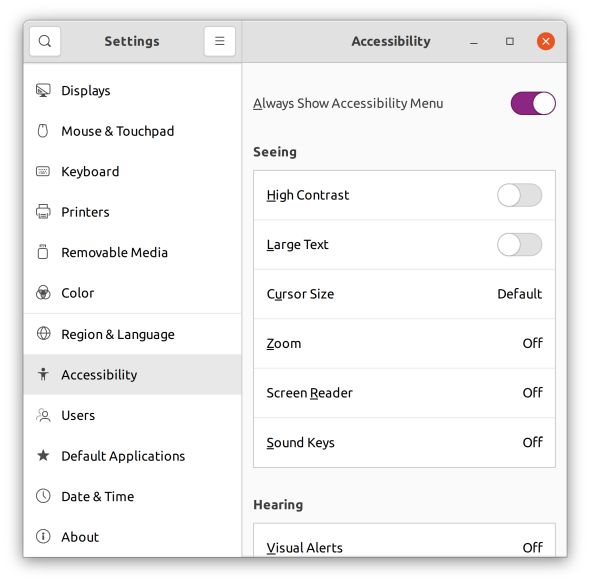
Make Text, Icons and the Pointer Bigger
Make Text Bigger
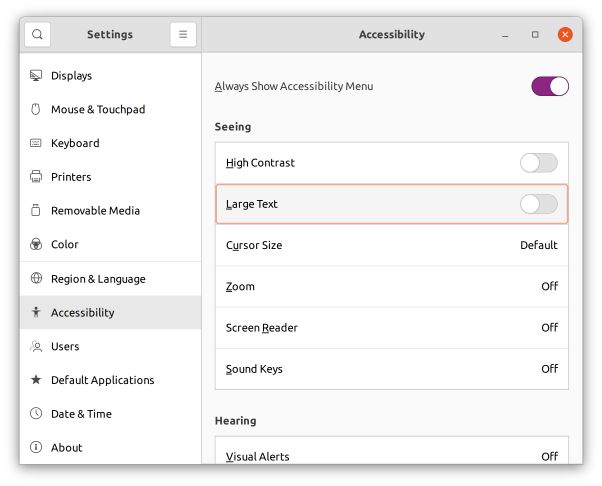
- Settings > Accessibility > Seeing
- Large Text
- Adjust the toggle to on
Tips & Notes
Large Text will increase the size of text found in menus, icons, and certain applications. However, some text may not become bigger, especially text found in applications that use custom toolkits or toolkits from another desktop environment such as KDE. The size of large the text cannot be adjusted from the accessibility settings screen.
Make Everything Bigger
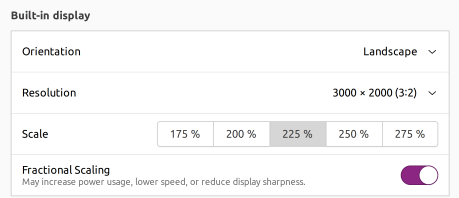
- Settings > Displays > Built-in Display
- Scale
- Select from the options available
Pro-tip: turn the Fractional Scaling toggle on to get more options for screen scaling.
Tips & Notes
Display scaling will increase the size of text no matter the application, however it will increase the size of everything including images, icons and apps as well. Explore the different percentages to find one that works best for you.
Large Mouse Pointer
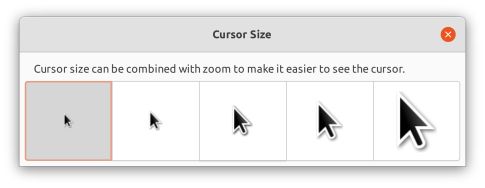
- Settings > Accessibility > Seeing
- Cursor Size
- Select a preferred size
Tips & Notes
Changing the color of the mouse pointer in Ubuntu is possible, but requires knowledge of the command line interface.
Adjust Colors and Contrast
Enable Dark Mode
- Settings > Appearance> Window Colors
- Choose Dark
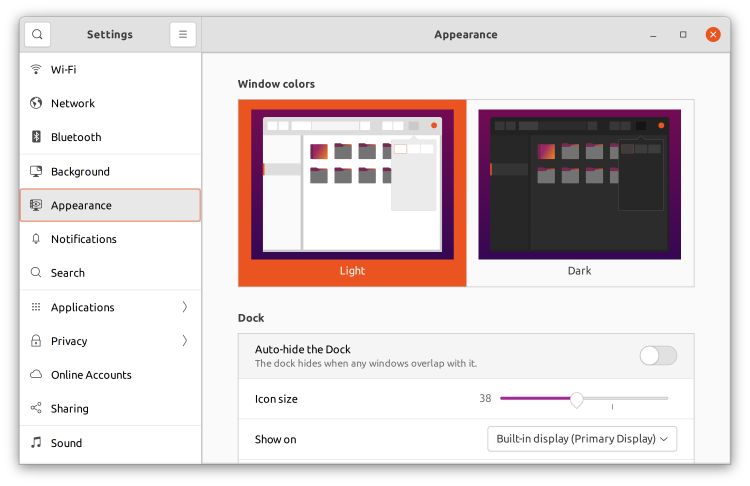
Tips & Notes
Dark mode replaces the standard light background & dark text system theme with a dark background light text theme which can make text easier to read for some individuals and may reduce eyestrain.
Try High Contrast
- Settings > Accessibility > Seeing
- High Contrast
- Adjust the toggle to on
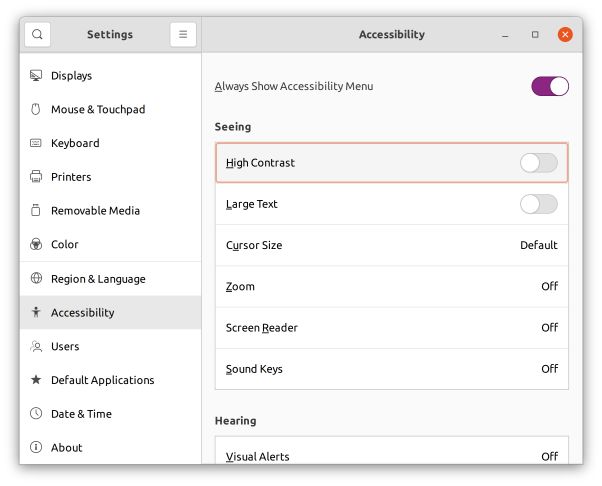
Tips & Notes
The selected theme cannot be customized.
Use Night Light
- Settings > Accessibility > Display
- Select the Night Light tab
- Adjust the toggle to on
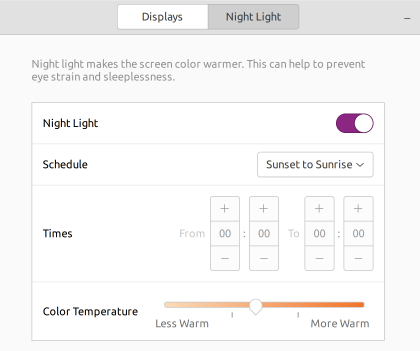
Tips & Notes
Night Light reduces the blue light emitted from the computer screen. Reducing blue light may reduce eye strain when used in dimly lit or dark settings.
Magnify Apps, Text and Use a Screen Reader
Use Zoom
- Settings > Accessibility > Seeing
- Zoom
- Adjust the toggle to on
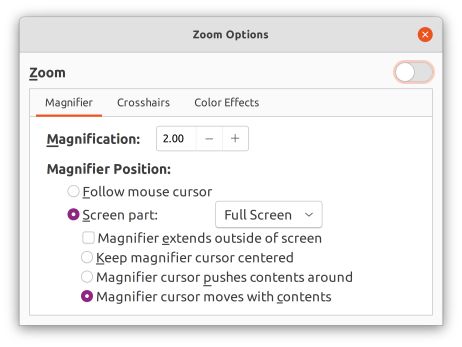
Tips & Notes
Zoom can enlarge the entire screen, or parts of it as needed. Options can be adjusted from the settings menu.
Zoom Apps
On the Web: hold CTRL and press the + key to zoom in.
Tips & Notes
Use this shortcut to quickly increase the size of the text in any web browser.
Use the Built-In Screen Reader
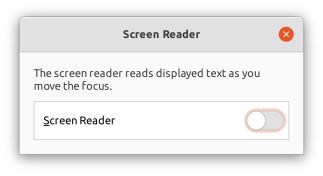
- Settings > Accessibility > Screen Reader
- Adjust the toggle to on
Tips & Notes
Orca is a screen reader designed to support individuals who are blind or who have limited vision.
Hearing
Turn on Visual Alerts
- Settings > Accessibility > Hearing
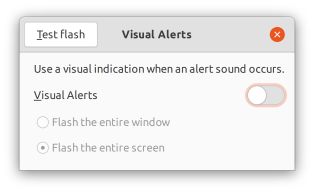
- Visual Alerts
Tips & Notes
The visual alerts feature can be set to flash the active window or the entire screen when an alert sound occurs. This is useful for people who would not be able to hear the alert.
Adaptive Keyboard and Mouse Settings (AccessX)
Activate Sticky Keys
- Settings > Accessibility > Typing
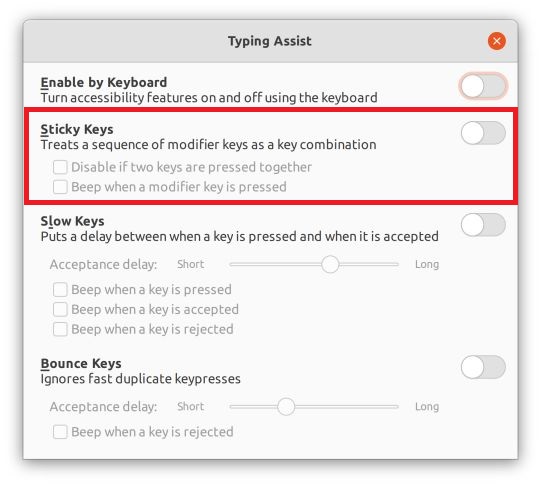
- Adjust the Sticky Keys toggle
Tips & Notes
Sticky keys is designed to enable one handed activation of multi-key combinations such as CTRL+ P (print) or Alt + Tab (switch windows). The feature holds down each system key (CTRL, ALT, Shift or Windows) until an alpha-numeric key is pressed.
Slow Keys
- Settings > Accessibility > Typing
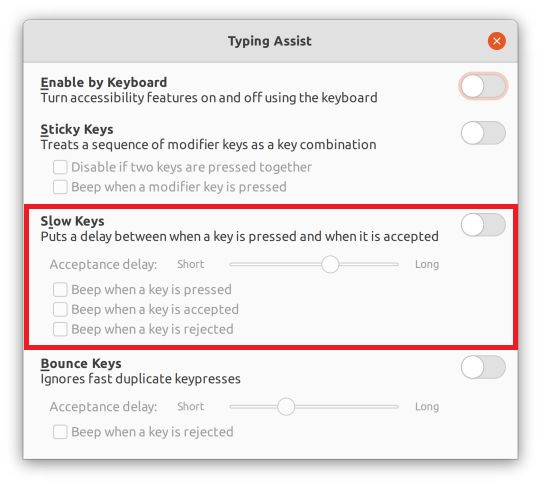
- Adjust the Slow Keys toggle
Tips & Notes
Slow Keys can be used to ignore brief or repeated keystrokes by increasing the time required between key press and activation which may be useful for people who have difficulty targeting keys or who have a tremor in their hands.
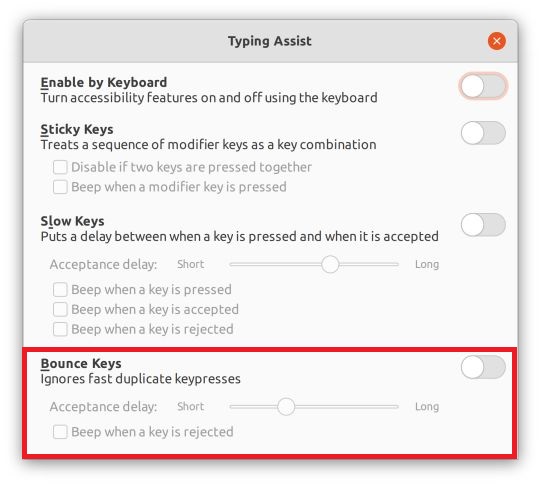
Bounce Keys
- Settings > Accessibility > Typing
- Adjust the Bounce Keys toggle
Tips & Notes
Bounce Keys can be used to prevent accidental repeated keystrokes by increasing the time required between accepting key presses.
Mouse Keys
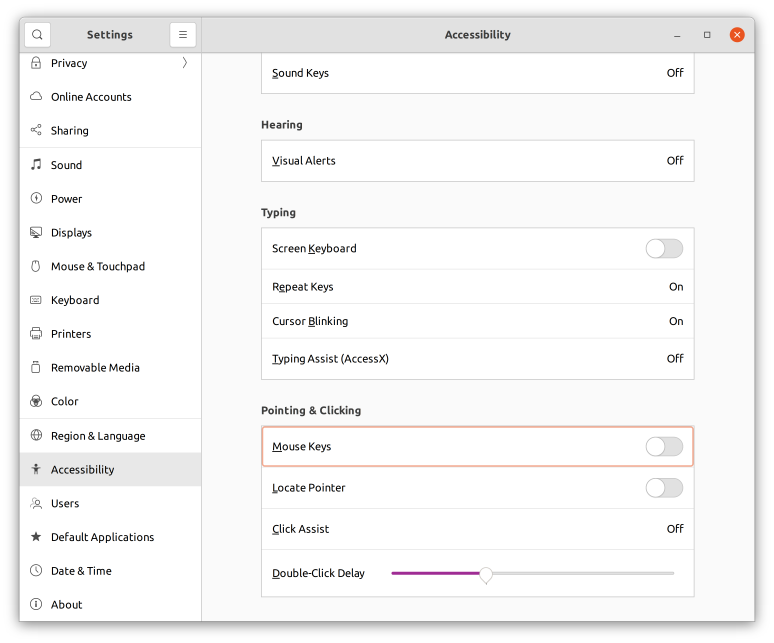
- Settings > Accessibility > Pointing & Clicking
- Adjust the Mouse Keys toggle
Tips & Notes
Mouse Keys enables use of the keyboard to control the mouse pointer.
Click Assist
- Settings > Accessibility > Pointing & Clicking
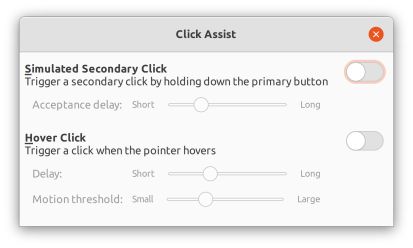
- Click Assist
- Adjust the Hover Click toggle
Tips & Notes
Click assist provides two features that makes using the mouse easier for someone who has difficulty clicking the standard mouse buttons.
- Simulated Secondary Click: enables a double click gesture when the primary mouse button is held down for a set period of time.
- Hove Click: sends a mouse click when the pointer stops moving for a set period of time.
Center for Inclusive Design and Engineering (CIDE)
CU Denver
The Hub, Bioengineering
1224 5th Street
Suite 130
Denver, CO 80204
303-315-1280
Sponsored Programs
Engage with Our Center
Need Assistance?
CMS Login


